Managed Lunar.dev Gateway Setup
A managed Lunar.dev API Consumption Gateway is available to closed-beta users. Claim your own Managed Lunar.dev Gateway at Lunar.dev control plane
Welcome to Managed Lunar.dev Gateway Setup. In this section we will walk through the steps of setting up your Lunar.dev profile, Gateway, and applying your first Lunar.dev Flow.
Step 1: Sign up for your Managed Lunar.dev Gateway
Sign up in the Control Plane. Once you have signed up you’ll get an email sent to you with the next steps.
Step 2: Make a test HTTP call to your Lunar.Dev Gateway
Use the following command to make sure you succeed in passing traffic through your newly provisioned Lunar.dev Gateway.
- cURL
- wget
curl -H "x-lunar-api-key: $LUNAR_API_KEY" \
       -H "x-lunar-scheme: https" \
       -H "x-lunar-host: httpbin.org" \
       -w "\nHTTP Code: %{http_code}\n" \
       https://hosted-gateway.lunar.dev/anything/hello-world
wget --header="x-lunar-api-key: $LUNAR_API_KEY" \
     --header="x-lunar-scheme: https" \
     --header="x-lunar-host: httpbin.org" \
     --server-response \
     -qO - \
     https://hosted-gateway.lunar.dev/anything/hello-world
Make sure that your API key is correct and matches what can be found in the Control Plane.
This can be found by clicking on the API Keys menu option under Configuration.
After successfully making this call to the API Provider you should get this response:
{
  "args": {},
  "data": "",
  "files": {},
  "form": {},
  "headers": {
    "Accept": "*/*",
    "Host": "httpbin.org",
    "User-Agent": "curl/8.7.1",
    "X-Amzn-Trace-Id": "Root=1-67adc555-05c06de202863a9137538d52",
    "X-Forwarded-Host": "hosted-gateway.lunar.dev"
  },
  "json": null,
  "method": "GET",
  "origin": "10.10.1.92, 123.222.321
  .31",
  "url": "https://hosted-gateway.lunar.dev/anything/hello-world"
}
The values in some of the fields, like User-Agent or Origin IP Address may have different values.
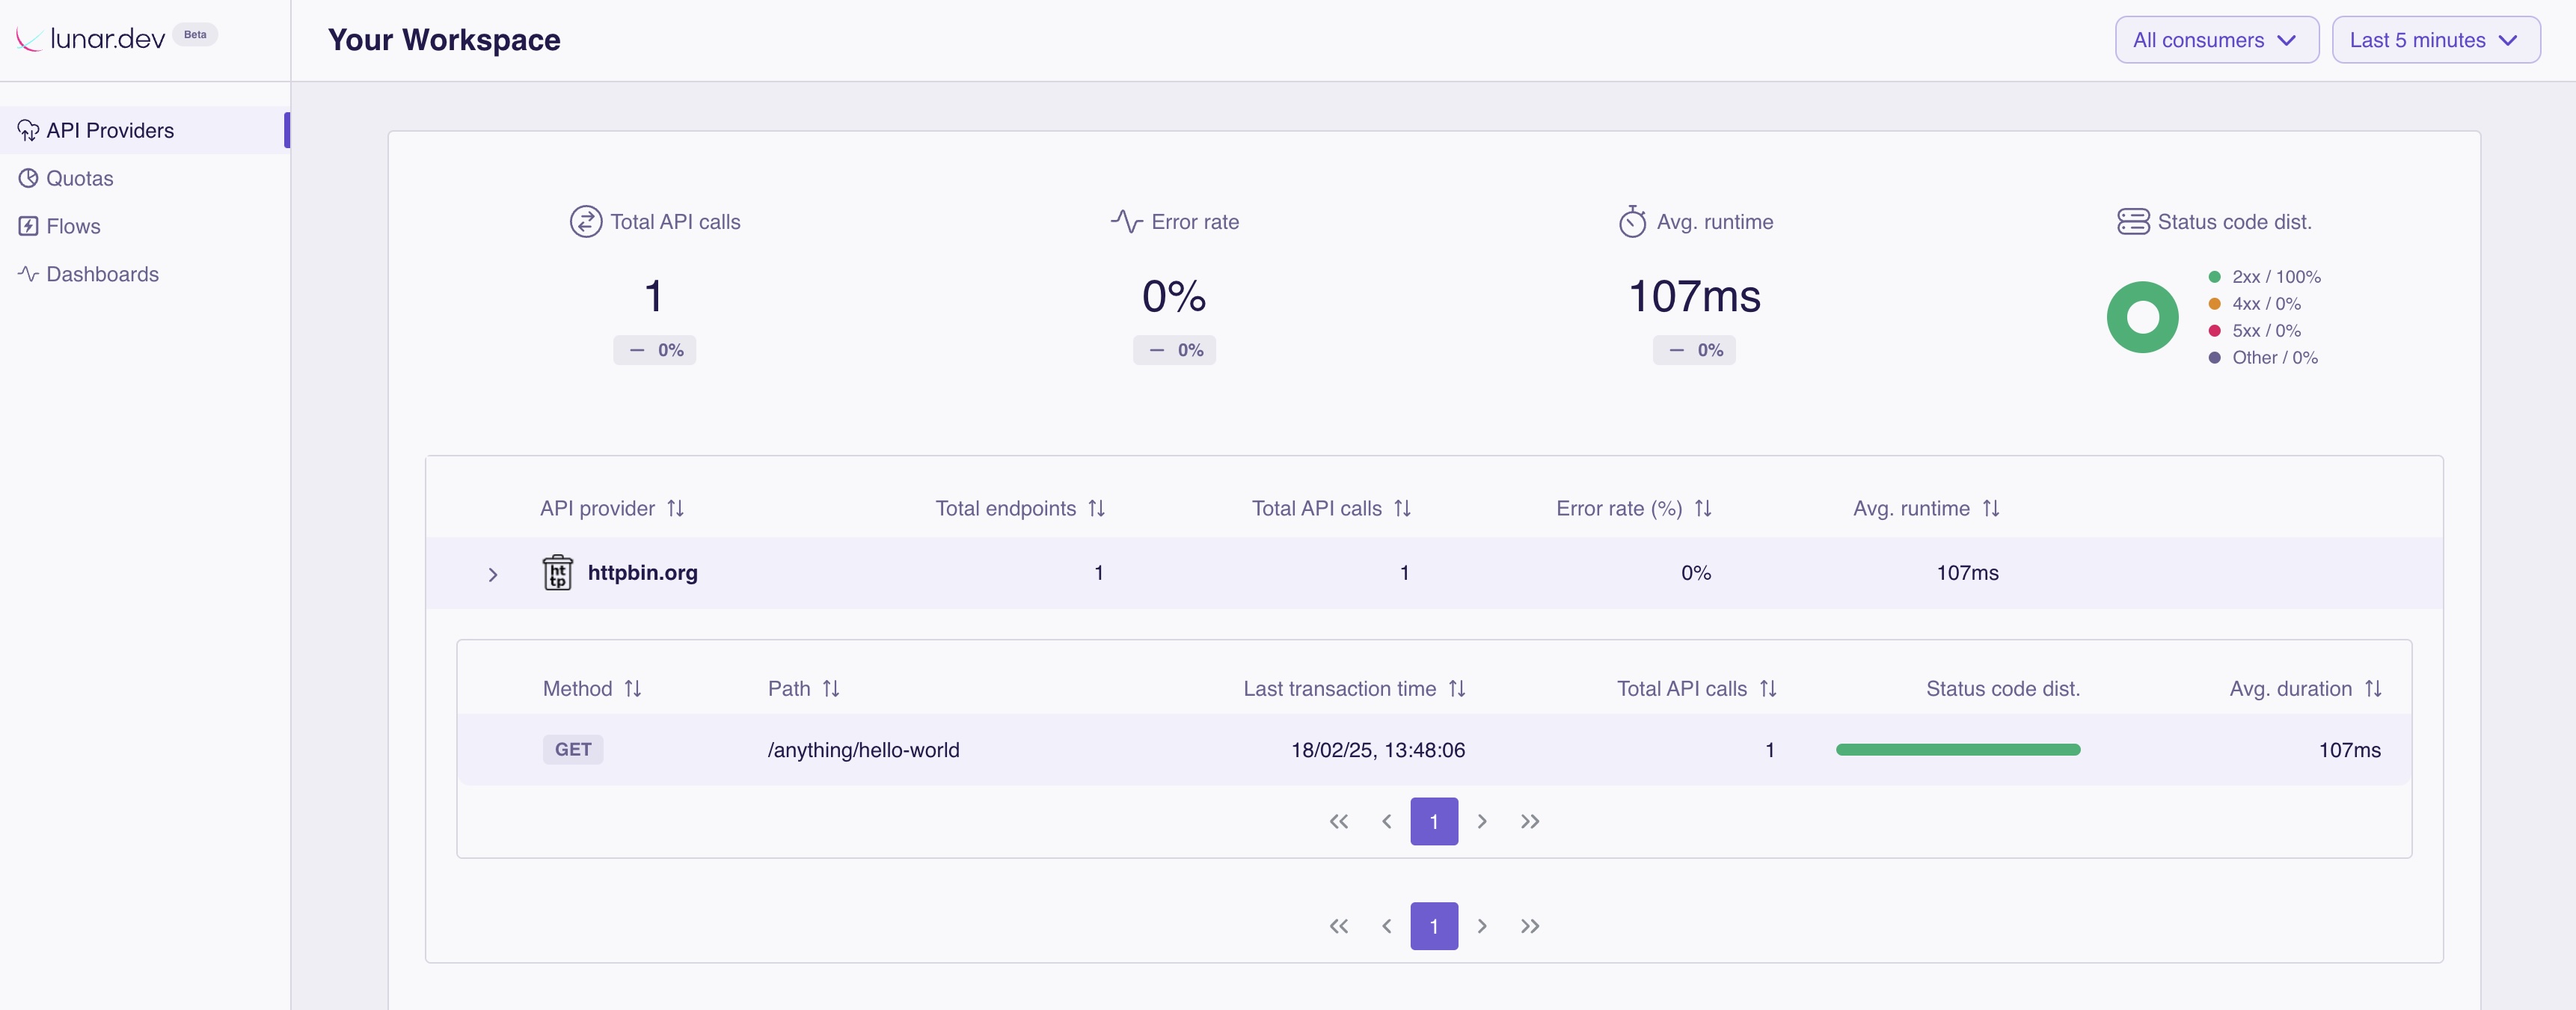
You can see the request in your Lunar.dev Control Plane
Step 3: Apply Your First Lunar.dev Flow
Next, please download the Hosted Lunar.dev Tools file containing a config file with a sample Lunar.dev Quota, Flow, and the correct file structure you will need to use Lunar.dev. This file will also contain sample flow.yaml and quota.yaml files we will use to test the system.
Unzip the file and navigate to your newly created directory in your terminal. Evoke the following script to apply your test flow.
./apply_config.sh ./config $LUNAR_API_KEY
- ./apply_config.sh is the name of our script
- ./config is the location where this script exists. If you have changed the file name or location of the script make sure to update this parameter.
$LUNAR_API_KEYis your API key. Make sure to update this with your personal key.
Once you have successfully run this you will see this response:
✅ Flows applied successfully
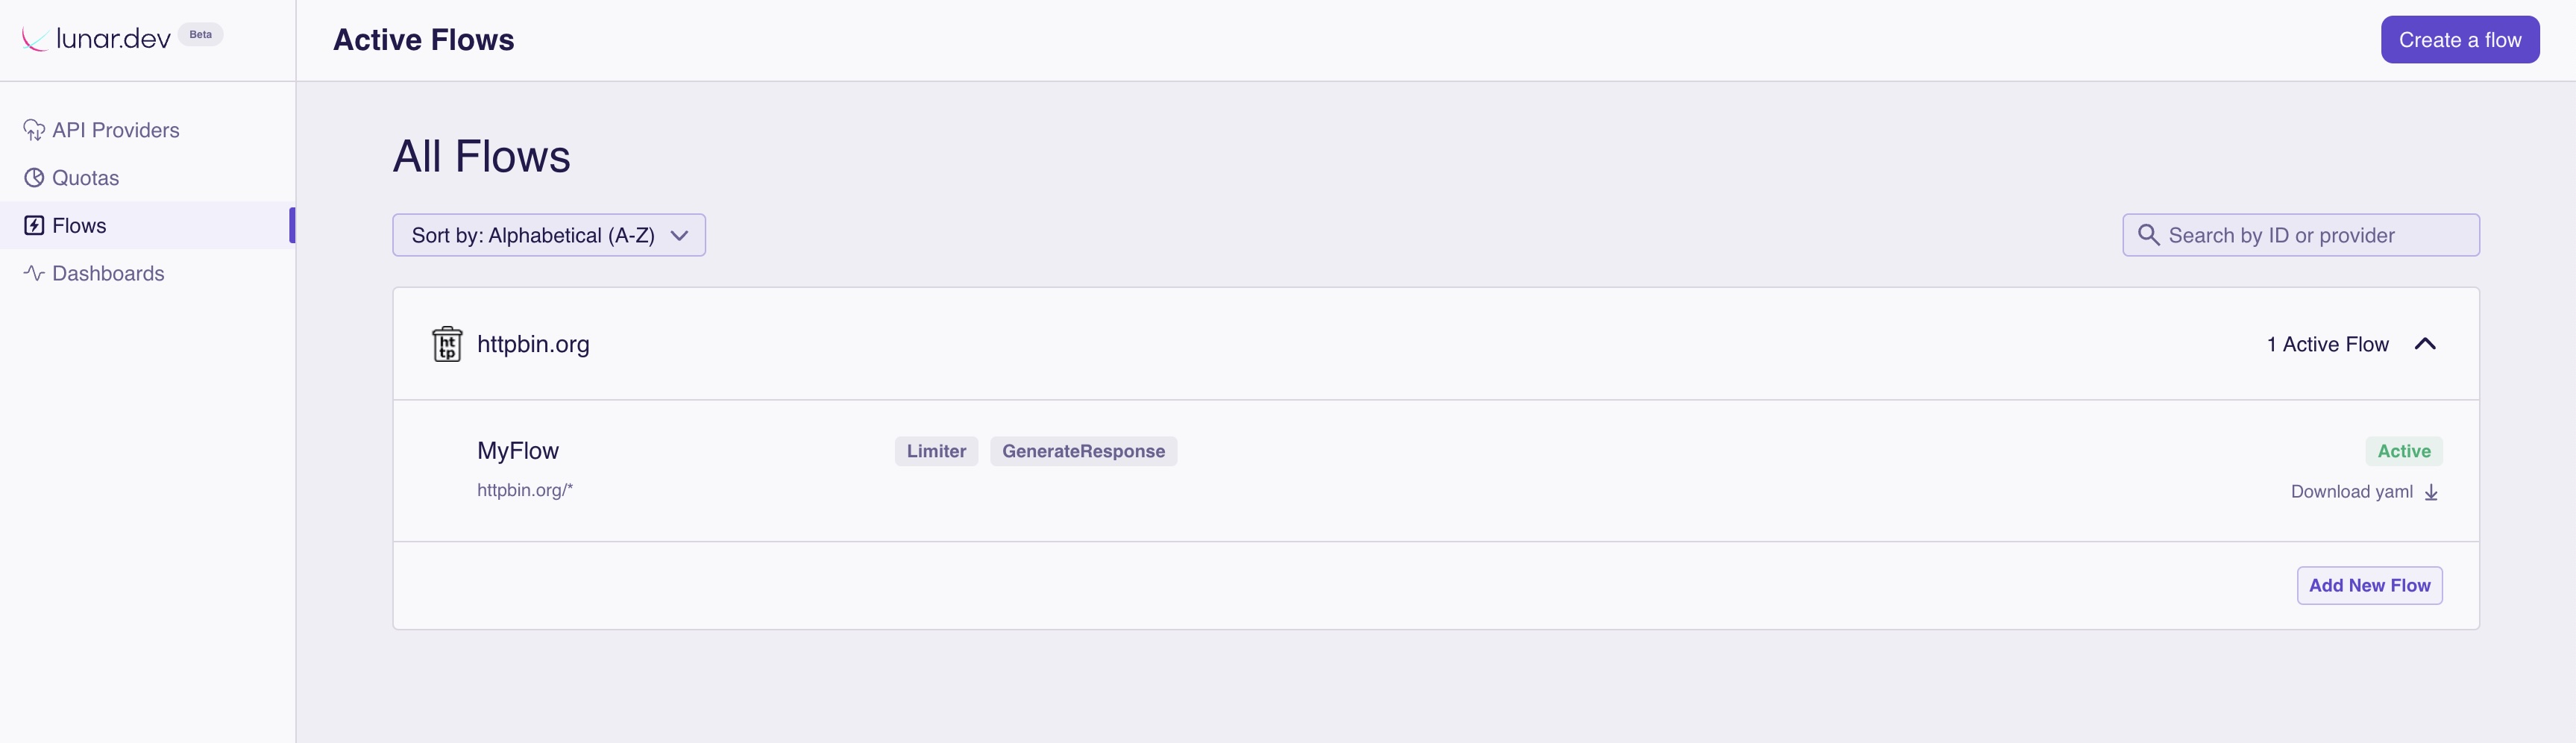
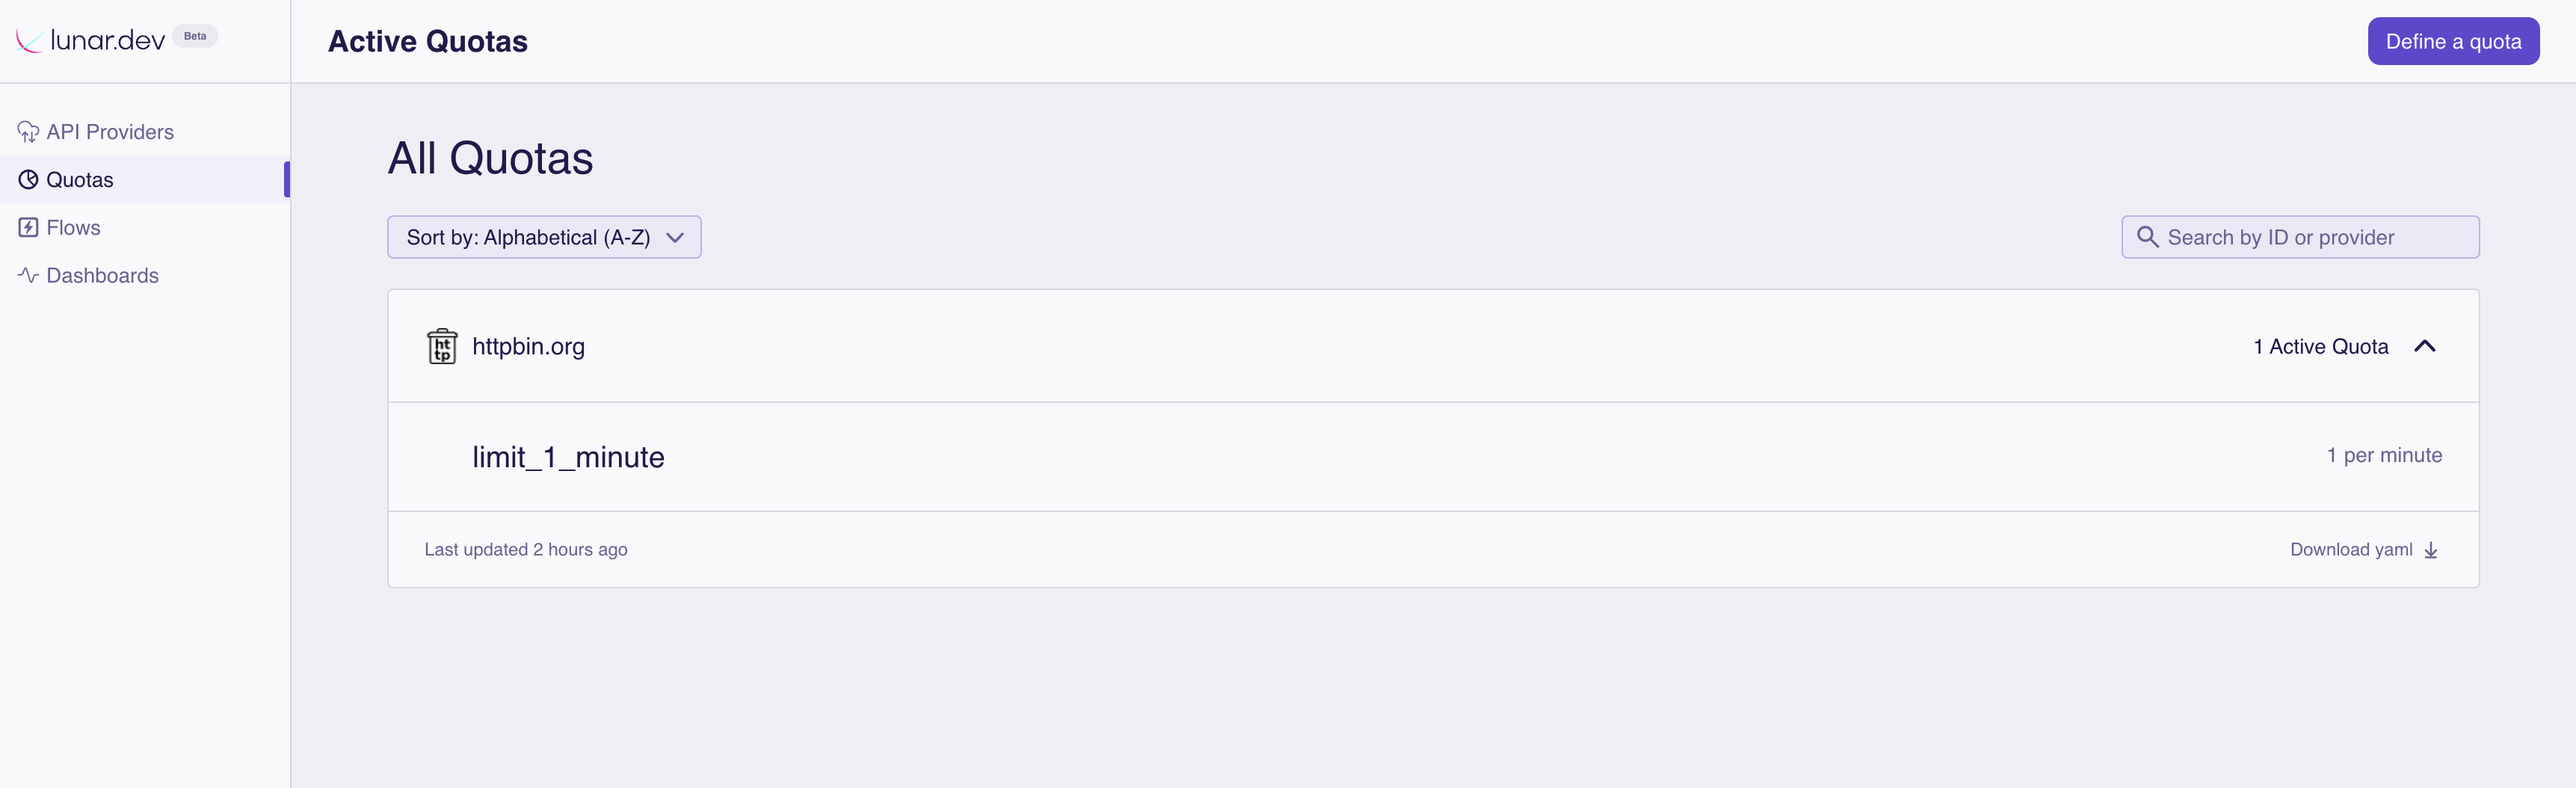
Once you have configured your Lunar.dev Flow, you can see the defined Flow and Quota in the Control Plane.
Congrats! You've now set up your Managed Lunar.dev Gateway 🎉
Testing your first Lunar.dev Flows
Now that we have seen that we get a response from the system, we can test how Lunar.dev Flows will work.
The Scenario: the example flow we have shared with you allows for 1 request per minute, any additional request within the same minute will result in a 429 Quota Exceeded response generated by Lunar.dev.
First, try sending one request using the curl command as we did above - and see the successful response from the provider httpbin.org.
{
  "args": {},
  "data": "",
  "files": {},
  "form": {},
  "headers": {
    "Accept": "*/*",
    "Host": "httpbin.org",
    "User-Agent": "curl/8.7.1",
    "X-Amzn-Trace-Id": "Root=1-67add9a9-1f81b3c73cd54ba049804da3",
    "X-Forwarded-Host": "hosted-gateway.lunar.dev"
  },
  "json": null,
  "method": "GET",
  "origin": "10.10.1.98, 123.123.123.31",
  "url": "https://hosted-gateway.lunar.dev/anything/hello-world"
}
Now, wait one minute and try sending two requests one after the other, without waiting in between. Here you’ll see that the second request has Lunar.dev Generated 429 response since it passed the limit of 1 request per minute. The second response will look like this:
Quota Exceeded. Please try again later.
HTTP Code: 429
Hosted Grafana Dashboard
As part of your managed Lunar.dev Gateway, you will also have access to a Grafana instance with preconfigured dashboards displaying data from your Lunar.dev Gateway and Flows.

Once your managed Gateway is ready, you can access your Grafana instance at https://hosted-gateway-monitoring.lunar.dev/{your-gateway-logical-id}.
Your logical_id will be sent to you in the email you receive when your Managed Lunar.dev Gateway instance is ready.
To log in to Grafana:
- Username:
admin - Password: Your Lunar.dev API Key
All that’s left for you to see the full power of Lunar.dev is to route your own traffic through the system and apply a flow!